One of the most useful woodworking skills you can learn is how to make a solid timber panel. Once you’ve got this down, the possibilities are endless. Nearly every project will involve a panel glue up - think dining tables, desks, entertainment units and more.
Join Nathan in this step-by-step guide as he shows you how to build a timber panel from start to finish, using tools you probably already have, and offering simple alternatives where you don’t.

Step-by-Step Guide on how to make a timber panel
What You'll Need:
Basic Tools:
(Don’t worry if your workshop isn’t fully kitted out, we’ll mention simple workarounds too.)
- Tape measure, square & pencil
- Table Saw, track saw, circular saw or handsaw
- Orbital sander or sanding block
- Jointer, thicknesser, hand plane or you can even purchase pre-done DAR (Dressed All Round) timber
- Safety gear (yes, we’re talking eye, ear and lung protection)
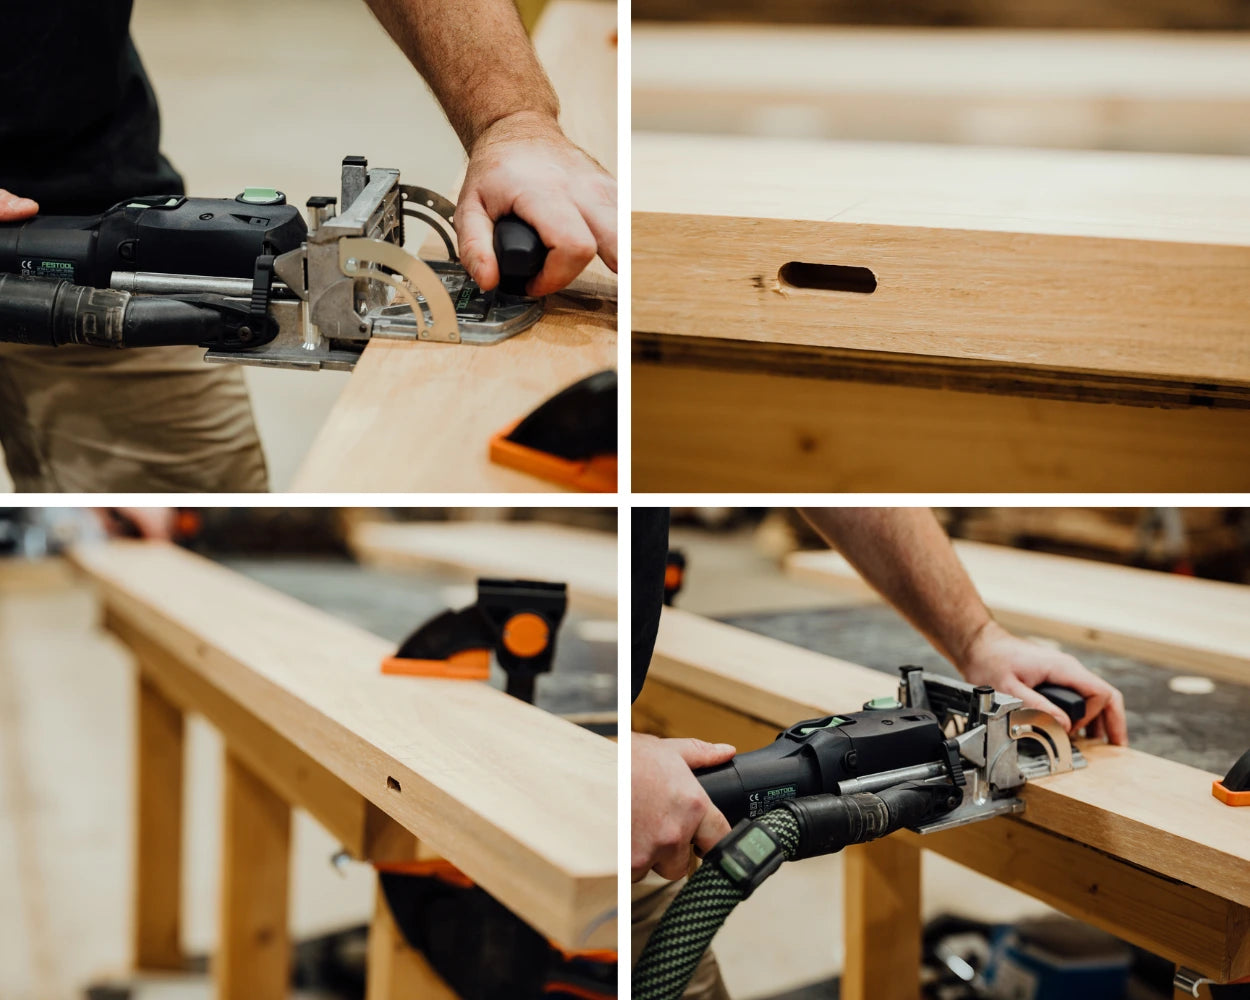
- Optional - Domino Joiner, Biscuit Joiner or Dowels
Materials:
- Techniglue or other adhesive of choice
- Your favourite joinery timber
- Sandpaper (various grits)
- Finish of choice – we used Osmo Polyx Oil
- Applicator – brush or cloth
INSTRUCTIONS:

Step 1: Select & Prepare Your Timber
Start by choosing your timber, pick something you like the look and feel of. We dressed ours using a jointer and thicknesser, but a hand plane/circular saw does the trick too. Or, skip the prep and grab some pre-dressed boards to save time.

Step 2: Arrange for Grain & Colour
Lay out your boards and take a moment to arrange them so the grain flows nicely and the colour tones complement each other. Remember to alternate the grain to minimise the chance of cupping or warping. It's a good idea to mark the grain direction on the end grain to help when rearranging the boards.
Tip: Give them a quick spritz with water to preview how the timber will look once it’s finished.

Step 3: Make Those Timber Joins Disappear (optional to help with alignment)
Mark evenly spaced join locations based on the length of your panel. We went with four per edge for this 1400mm long panel. Use a domino joiner, biscuit joiner or dowels at each mark to cut your holes. Don't have any of the above? That's totally fine. Use a good quality glue and the bond will be stronger than the timber itself, the biscuits/dowels are only used for alignment in this application.

For bonding, we used Techniglue, a high-strength structural epoxy, but you can use whatever quality glue you prefer. Apply glue to each biscuit/dowel and the full edge of the panel before joining.

Step 4: Join, Clamp & Let It Rest
Insert the dowels into the timber, align your boards, and clamp it all together (firm, no need to hang off the clamps). We used a wall-mounted clamping system, but standard clamps will work too. Let it dry fully before moving on.

Step 5: Level & Sand
Once dry, scrape off any excess glue from the timber and give it a thorough sand. We used a wide belt sander, but use whatever you’ve got, from a belt sander, palm sander to good old fashioned elbow grease.

Step 6: Trim to Size
Mark your final dimensions and trim off any excess. A panel saw makes quick work of this, but a circular saw, track saw or hand saw will do the job just fine.

Step 7: Final Finishing Sand
Sand through your grits and give the panel a smooth, clean finish ready for your chosen finish. Be sure to sand to the grit level recommended by the manufacturer of your chosen finish for best results.

Step 8: Apply Your Finish
Follow the instructions for your chosen finish. We used a 4mm microfibre roller to apply our Osmo Polyx Oil for a smooth, durable, natural look.

Ready to try it yourself? Snap a pic of your panel and tag us @hammerroo, we’d love to see what you’re building!
The Hammer Roo Team


